Raspberry Pi as fake mass storage
Disclaimer: Since the advent of Ventoy, this is much less useful, but a fun project nevertheless.
Intro
Ever wanted a Multiboot drive but realized turning a flash drive into one is impossible with some images(Windows in particular), and commercial solutions start at 50 EUR?
Let's use the 10 EUR Pi Zero W instead.
The board uses MiniHDMI. You can find Mini+MicroHDMI to HDMI connectors for under 1 EUR on Aliexpress. However video output is technically not needed, especially if you have the W version of the board.
The 5 EUR Pi Zero without Wi-Fi can also be used, but is less comfortable for my use, pushing images over the internet into it via rsync is comfy.
Benefits over a simple flash drive:
- Can store many images
- No need to flash the whole storage every time
- Can push images to it over the internet (W version)
- Can pretend to be a USB CD-ROM for compatibility with old hardware
- Can host up to 8 images at the same time, including simple storage, so you can use it as a flash drive + bootable ISO concurrently EDIT: This should go up to 256 with max_loops kernel param possibly?
- Cool points
Disadvantages:
- You need a power source
- Physically bigger than a simple flash drive
- Longer initial setup
Requirements:
- Pi Zero (W)
- MicroSD card
- Computer with Linux
Optional:
- $1.5 china case
- OLED screen
- Physical buttons
Problems:
- Can't get BIOS boot to work through GRUB (Windows) via loop back created image
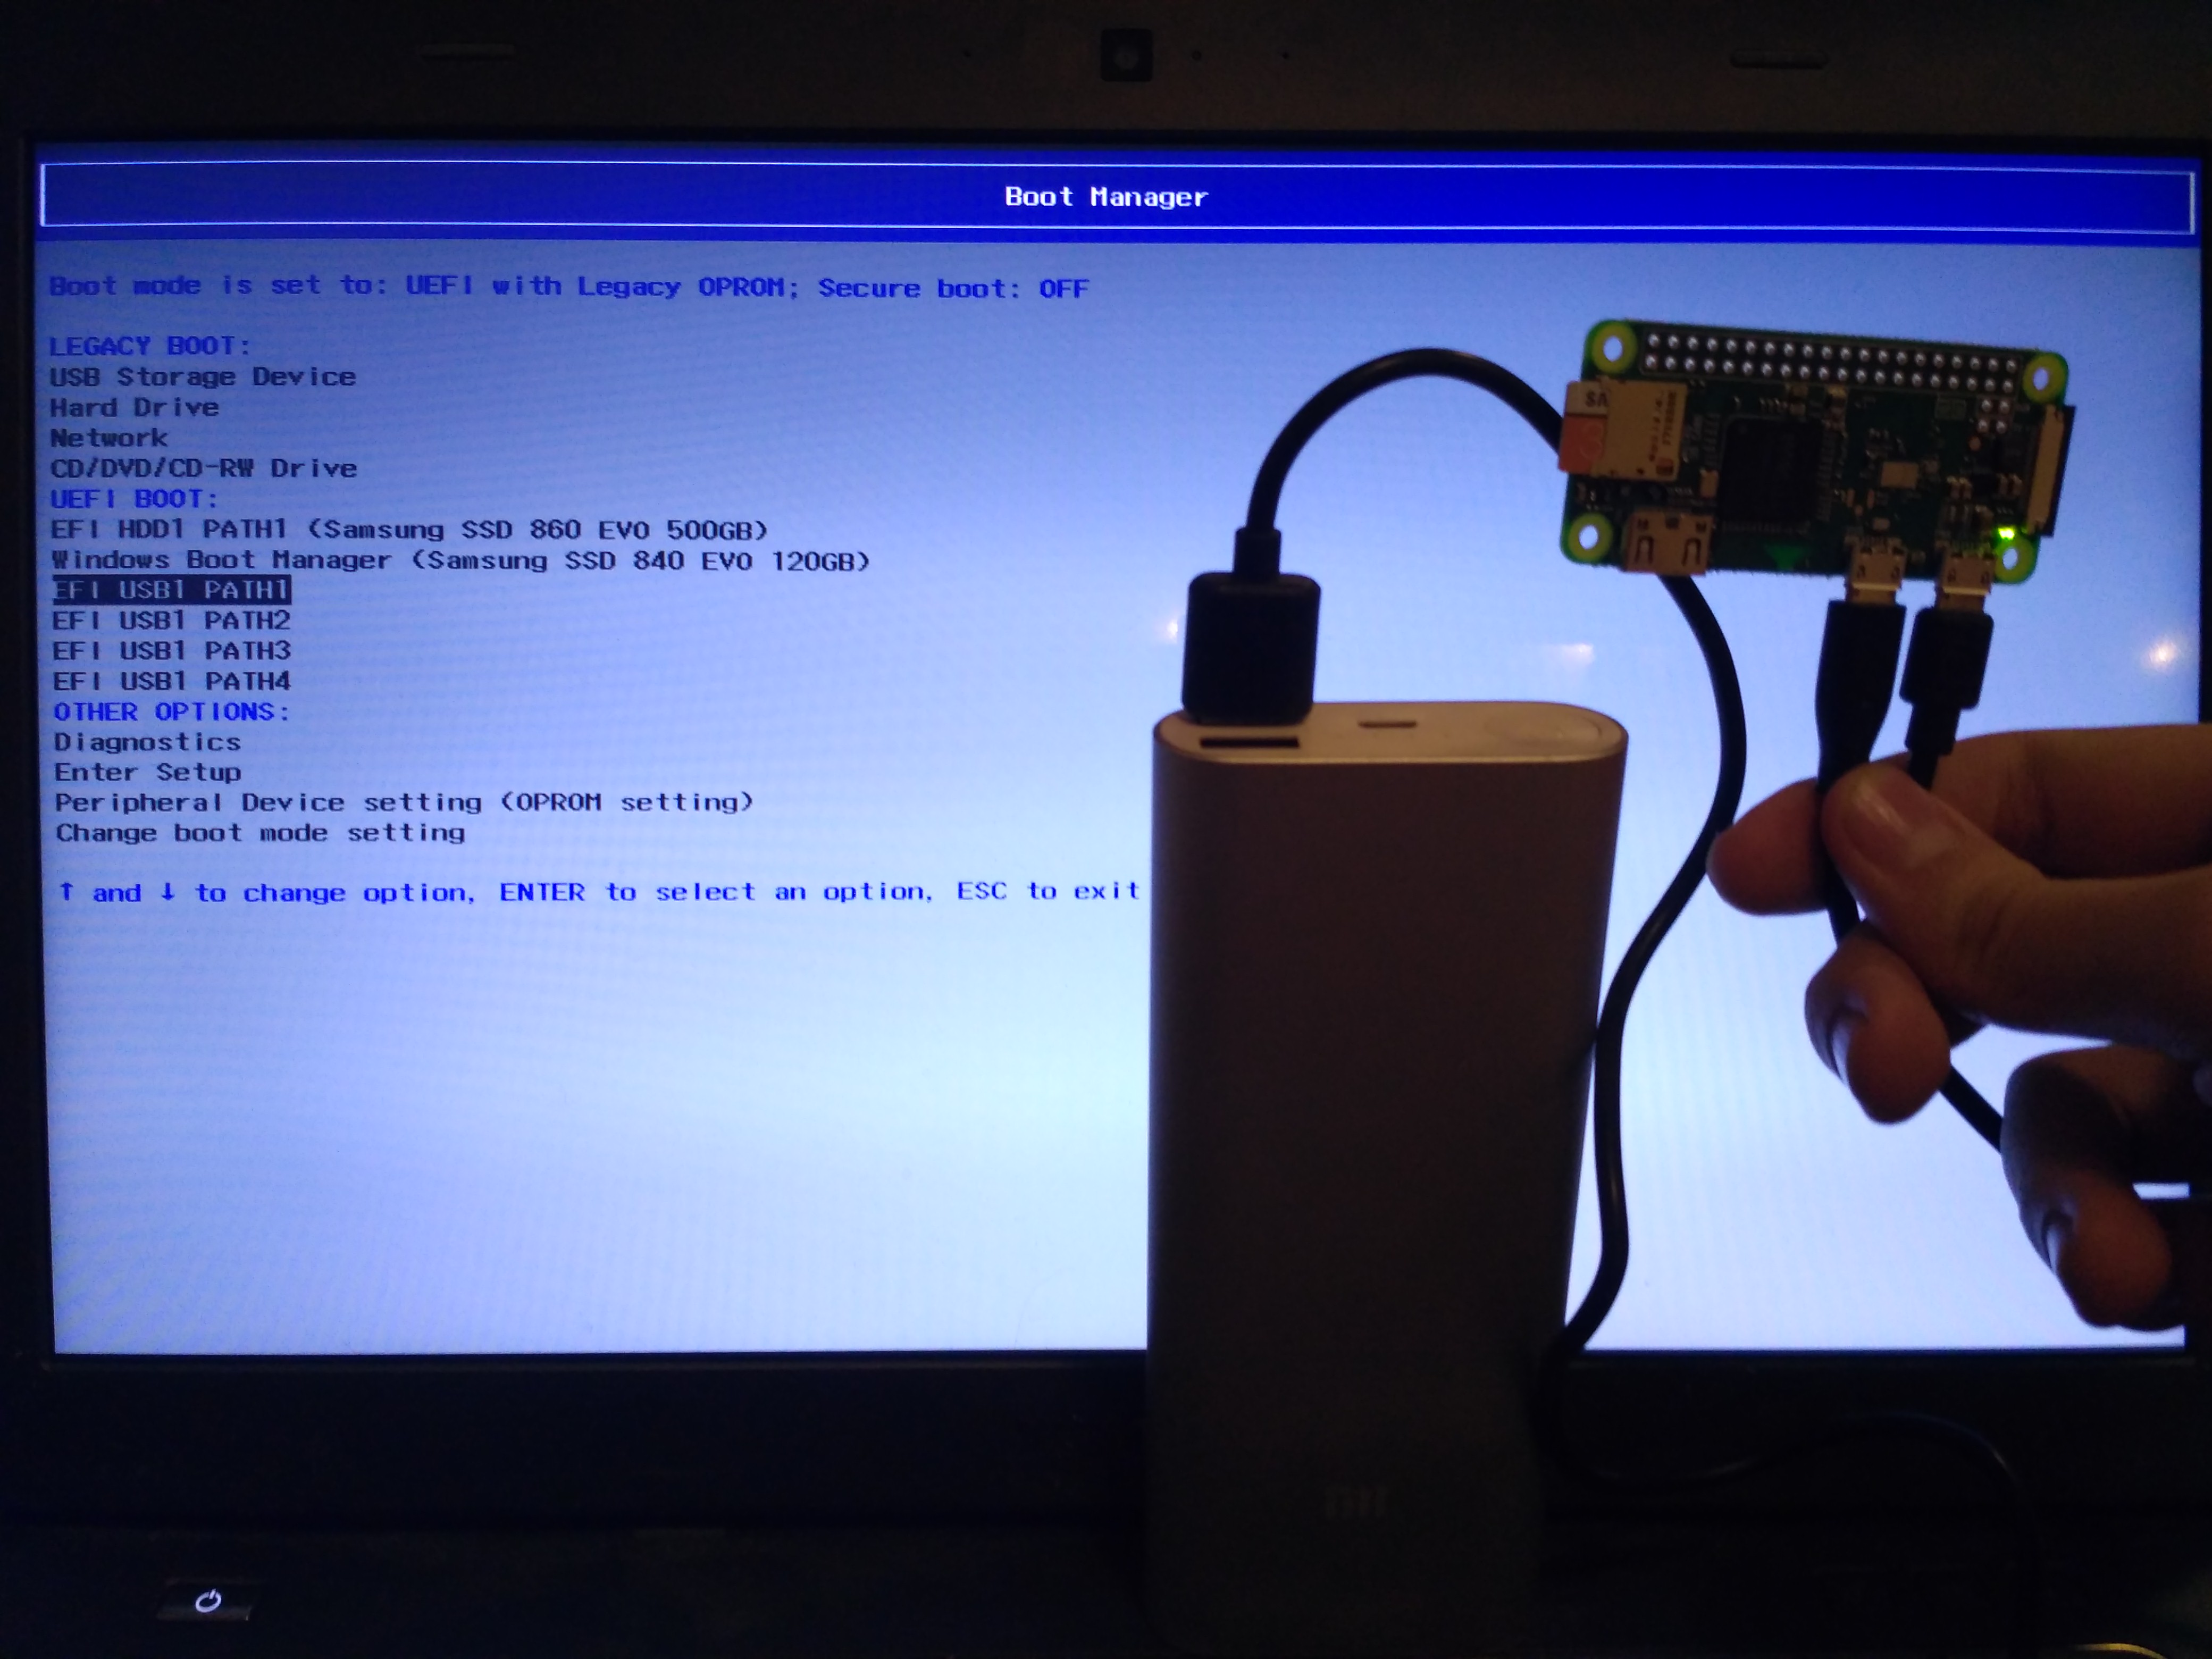
- Mounting via mass storage does not give the 'device' a name, making it really confusing if you're hosting multiple images at once, as per the picture
- Mounting images as DVD-ROM is not possible and CD-ROM is limited to 2.4GB, if you're a kernel dev or wanna try fixing that - here's a thread on LKML and a hacky patch
- Rebooting the computer when booted in the OS reboots the Pi. Here's a bunch of possible solutions for that if you care:
<C0rn3j> I want to power a raspberry pi zero from a power bank, while also use it for data connection with a PC. This is an issue because as the PC reboots, so does the Pi sometimes, pretty sure its trying to take power through the PC instead of the power bank
<C0rn3j> how do I prevent it trying to power itself off of the second USB port?
<DocScrutinizer05> you get a USB Y-cable and connect the "middle" plug to PC, the "extension" plug to powerbankand obviously the other end to SBC, then you hope your PC won't barf up when external USB VBUS during reboot
<DocScrutinizer05> smarter approach is to add two schottky or ideal diodes from powerbank and from PC to SBC VBUS in
<DocScrutinizer05> a third solution is to use a cheap externally powered USB hub that's powered by your powerbank. The cheap USB hubs simply feed through external power to downstream USB VBUS
<DocScrutinizer05> hope I explained it sufficiently obscure to question all answers ;-)
<DocScrutinizer05> the hub simply feeds through the external power barrel jack to the downstream USB ports
<DocScrutinizer05> it however sometimes (not all do) has a diode preventing 5V power to go back from hub to PC
<DocScrutinizer05> the expensive high-quality hubs *might* have a transistor switch between external 5V in and each downstream port, and control those transistors via software. Rarely ever to be found but you should keep in mind those exist, when you encounter strange behavior
<DocScrutinizer05> then, USB also knows of a "software" suspend command that your SBC obviously should ignore if the PC actually does send it during reboot
Setup
My OS of choice is Archlinux ARM for the board, Pi Zero is essentially Pi 1. Follow the install guide for it. Stop before step 7 if you have to W version to setup Wi-Fi first.
Wi-Fi
If you have the W version of the board, you will want to setup Wi-Fi:
cat << EOF >> root/etc/systemd/network/wlan0.network
[Match]
Name=wlan0

[Network]
DHCP=yes
EOF

wpa_passphrase yourSSID yourPassword > root/etc/wpa_supplicant/wpa_supplicant-wlan0.conf

ln -s /usr/lib/systemd/system/wpa_supplicant@.service root/etc/systemd/system/multi-user.target.wants/wpa_supplicant@wlan0.service
USB Gadget
Now we setup the USB Gadget which will let us use all the fun features.
Edit /boot/config.txt and add a new line to it to use the needed driver:
dtoverlay=dwc2
Create /etc/modules-load.d/usbgadget.conf with the following content:
dwc2
g_mass_storage
Add max_loop=256 to the end of /boot/cmdline.txt. This raises amount of max loop devices from 8 to 256.
We're only interested in g_mass_storage for this use case. There is many more uses for this driver, check out this gist if you're interested.
Additional OS setup
If you're using the W version, install rsync, openssh, enable sshd on boot, disable password auth in sshd_config and throw your pubkey in root's authorized_key file.
W or non-W, reboot the board.
Usage
You have two ways to host your images - either via emulated mass storage or emulated USB CD-ROM.
Power the board on by connecting the PWR IN port to a power source. A power bank or another PC will do.
You will have to connect the board through the other USB port to a turned-off PC and cold boot it after you attach the image. Restarting the PC will also restart the board, see Problems in [[#Intro]].
If you want to mount another image after already mounting one, you have to remove the following first:
rmmod g_mass_storage
Emulated mass storage
The following approach works for most sane bootable ISOs. Default Windows ISOs are a snowflake and need to be remastered into an image with a FAT32 partition with the files copied over. Look up loopback devices if you need Windows, or implement emulated DVD-ROM as per Problems in [[#Intro]] and use the approach below.
modprobe g_mass_storage file=/archlinux.iso stall=0
You can also specify up to 8 images at once, although you don't want to do this since there's no way to distinguish them in UEFI/BIOS since the module does not give the emulated devices a name.
modprobe g_mass_storage file=/archlinux.iso,/anotherimage.iso,/guttedwindows.iso stall=0
Emulated USB CD-ROM
This approach does not work with ISOs over 2.4GB, see Problems in [[#Intro]].
modprobe g_mass_storage file=/archlinux.iso stall=0 cdrom=y
Emulated CD drive shows up as /dev/sr*
Additional setup
Tip: While this guide is for loading ISO images, you can load any image, including simple storage, or read only storage etc.
Case
An acrylic case is some $1.7 from Aliexpress.
TODO - picture
Display and buttons
TODO - Here goes additional software and hardware setup
Sources
https://elixir.bootlin.com/linux/latest/source/Documentation/usb/mass-storage.txt
https://www.kernel.org/doc/Documentation/usb/mass-storage.txt <- why is the formatting broken? Same link as above
Linux-sunxi has a bit of info not present on this page, I recommend you give it a read.